Original Post Dated July 6, 2009
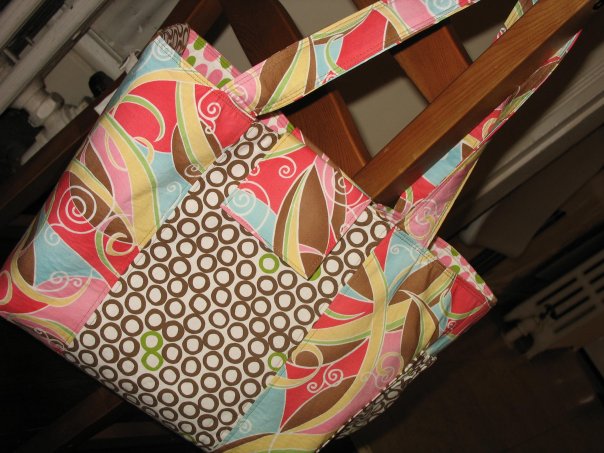
Craft Apple Diaper Bag Pattern
Format: Paper Pattern
Skill level: Intermediate
Designer: Linda from Craft Apple
Format: Paper Pattern
Skill level: Intermediate
Designer: Linda from Craft Apple
When Brandon left for work yesterday, I told him that my goal was to have the bag finished by 7pm. Sure enough, by 7pm I had washed and dried my hair, carried various dishes to the sink, and oh yes, finished my diaper bag! I gave myself a few pats on the back, took some photos of the bag, and added them to my facebook page for the world to see (of course).
Now, to give credit where it is due, I used this pattern from Craft Apple, who has one other bag pattern I may like to try at some point. (Remember, I am by no means good at following directions, so for me to have finished a project like this based on someone else's directions is quite a feat not only for me but for the pattern writer!) About mid-way through this project, I told Brandon that I would not be making this bag again. It was taking way too long, and I just couldn't figure out how to box the corners at the bottom of the bag. However, I feel differently now. I can now box the bottom corners with ease and I think that making the bag a second time would take me about half as long as it did this time--in other words, I would not need a three day weekend to complete the project!
If you're thinking of making this bag, here are a few notes from my experience:
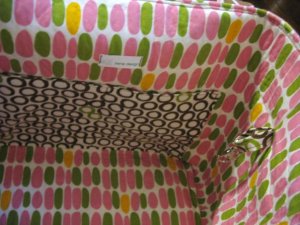
I pretty much stuck to the rules, with the exception of adding a key hook at the opposite end of the cell phone pocket. To do this I cut a piece of fabric 2"widex5"long. I folded in a 1/2" crease on each long side then folded it in half lengthwise to enclose the long raw edges (using an iron to keep folds in place). At this point, it measured 1/2"widex5"long. I sewed a 1/8" top seam on both long sides. I put a lobster hook on the piece of fabric and just sewed the raw edges into the middle seam when it was time. (Does all of that make sense??)
I used regular quilting-weight cotton fabrics rather than the heavier weight fabrics suggested on the pattern. The bag does not stand perfectly upright on its own, but that is not a big deal to me.
Rather than placing the interfacing on the fabric prior to cutting, I chose to cut the pieces and interface them separately because I knew I would have left-over fabric (I bought 1 yard of each of the three I used). I didn't want to have interfacing on my left-overs. The problem is that is it took me at least twice as long to do the initial preparation phase as it would have if I had just interfaced the whole fabric piece...I would not recommend doing what I did.
Also, I found that I needed 3 1/2 yards of interfacing and 1/2 yard of the Peltex 70.
Definitely take the extra 30 seconds to mark each piece with masking tape so you know which is which...there are a lot of pieces to this pattern, and it's much simpler to be able to pick up a piece and see the corresponding letter on it rather than guessing if you have the right one or not.
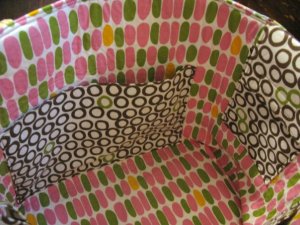
I really like that this bag has several varieties of pocket sizes for keeping all those weird things babies and mommies (or daddies!) need like pacifiers, bottles, diapers, and cell phones! My iPhone fits perfectly into the enclosed pocket on the side of the bag. The pockets are very sturdy because the fabric pieces get folded in half and are interfaced, so they don't seem flimsy even with using a lighter-weight cotton than called for in the pattern.
Finally, if you're wondering about the great fabrics I used, I got those from Above All Fabrics. The exterior side fabric is Sorbet Twist Watermelon from Moda Fabrics. The middle exterior fabric and pocket fabric is Cocoa Rings Circle Dot from Robert Kaufman fabrics, and the interior fabric is Spring Stones, also a Robert Kaufman fabric.
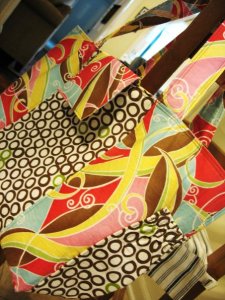
I'm really happy with how this bag turned out and can't wait to be able to use it (I have just about 7 weeks left!!) This is a pattern I will definitely be saving in hopes of making again.
(If you are interested in having a similar bag made for you or as a gift, feel free to contact me via email at irenedesign[at]ymail[dot]com).
Edited to add: I have since used this bag for nearly 8 months now. I still find that this is my go-to bag because it is just so functional. I have plans to make at least one more with more neutral colors so it coordinates with my outfits a bit more!
Hi, I ended up here while looking for diaper bag pattern reviews....and am so glad I did! I REALLY like your site!! Appreciate the review....Following as I love sewing and crafts and enjoy seeing what others are up to that do as well.
ReplyDeleteBlessings!
I am getting this bag pattern to make for my friend who is expecting (and for me in the future). Are there any changes besides the key ring loop you recommend?
ReplyDelete