All seams are 1/2" unless otherwise noted
Measurements are given as height x width
Start by gathering your materials. You will need:
Outer Pannel 8.5" x 13"
Inside lining 11" x 13"
Upper Flap 3.5" x 13"
Pocket Piece 10" x 13"
2 pieces of ribbon, 12" long
1 lightweight iron-on interfacing 7.5" x 12" {for outer pannel}
1 lightweight iron-on interfacing 10" x 12" {for inside lining}
Ruler
Scissors/Rotary Cutter
Turning tool (chopstick)
Pencil
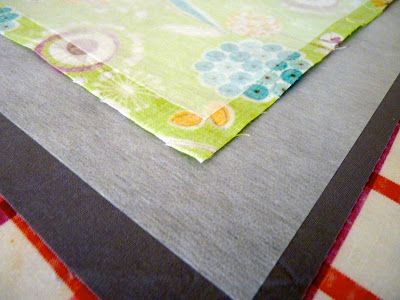
After you have cut your fabrics to size, adhere the interfacing to the back sides of your outer panel and inside lining pieces according the the manufacturer's directions. The interfacing should be centered so that it doesn't go to any of the edges of your fabric. This will help keep some of the bulk out of the seams.
While your iron is still hot, fold the pocket piece in half, with the wrong sides together, so that it measures 5" x 13". Iron to set the crease. Set the pocket and inner lining pieces aside for now.
Place your outer panel piece right side up, and lay the upper flap piece on top of it so the right sides are together. The pieces should line up across the top. Pin in place and sew along the top (the 13" side), backstitching at the beginning and end.
Press this seam open and iron the right side as well just to get out any wrinkles.
Now you are going to stitch a line along the very top of the flap as close to the seam as you can get without actually being in the seam. This will help create a clean crease when we finish the flap at the very end.
Take your two pieces of ribbon and stitch them onto the printed side of your outer panel about 3" down from the seam between the panel and the flap. The ribbons should be on your right side as shown in the picture. Do not backstitch; this is basically just basting them in place. The seam allowance here is less than 1/4".
Now lay your inside lining piece flat and lay the pocket piece over it. The bottom raw edge of the pocket should line up with the bottom of the inside lining so the fold of the pocket is on top. Get your ruler and mark a line that is 3" from the left side of the pocket. Each of the following measurements work from the last line your drew: 2" (so now 5" from the left side...), 1.5", 1.5", 1", 1". You can customize this however you want, but I found this gives enough variety to fit several different sized brushes. At this point I place several pins around the edges just to be sure everything stays in place while I'm sewing the pocket lines.
Sew along each of your pocket lines, being sure to backstitch at the beginning and end of each. At the top of the pocket, I backstitch 5-6 stitches just to be sure the brushes don't wind up pulling out my stitching.
I also stitch about a 1/4" seam along the two raw sides of the pocket piece so I know it won't move while I'm sewing everything together.
Now lay out your outer panel piece with the right side up and arrange the ribbon so it won't get in the way while you sew it all together {The flap should lay flat at the top at this point}.
Lay the inner lining/pocket piece right side down on top of the outer pannel. The pocket should be on the bottom so things aren't upside-down when you're all done! Pin around the edges to keep everything in place as you sew.
I use special pins to mark where I am going to start and stop sewing. You'll need to leave a 3" opening when you sew so that you can turn the whole thing right side out. Just be sure the opening is not where the pocket is; that will make closing it a bit more difficult. The top would also be a suitable place for this opening. Sew all the way around the edges of your roll, with the exception of your 3" opening. Be sure to backstitch at the beginning and end.
Clip your corners to take off some excess fabric but be sure you don't clip your stitches! {I've made that mistake several times.}
Now start to gently pull the roll out through the opening so that it is right side out. It will get wrinkled during this process, but that's OK! Use your chopstick or other turning tool to push out the corners and seams all the way around the roll.
At this point, I make sure my steam is turned about high on my iron, and I iron the entire roll flat. I set my seams so that everything will line up the way I want it to when I topstitch all of it. Double check that you didn't bunch up your fabric in the opening so when you sew it closed, you won't have any weird gaps.
Beginning at the opening you used for turning the roll, topstitch all the way around the roll with a 1/8" seam. You're almost finished!
With the steam still set on the iron, iron your flap piece towards the inside of the roll. The line you stitched on it at the beginning should help it roll over evenly so that your seam between the flap and outer panel lays centered at the top.
Now fill your roll with your make-up brushes and enjoy!!
If you make one of these, I would love to see it. Feel free to post a link to your picture or blog post in the comments. Also if you have any questions, you can leave them in the comments and I'll answer there as well as via email.
Happy Sewing!


I love this! Thanks for the tutorial, I pinned it so I can make it soon! Did you submit it to Craft Gossip?
ReplyDeleteyes, please. I would love to have one of these.
ReplyDeleteThis looks lovely- I've been thinking about a similar item to store my knitting needles, so I'll just upsize a little. Thanks for the excellent instructions.I'm so glad I found you on Craft Gossip!
ReplyDeleteI loved your tutorial. I only had one problem when making mine...maybe its just because it was my first 'real' sewing project! I love mine though, so thanks so much! :)
ReplyDeletecollegekid01.blogspot.com
Thank you so much for a fantastic tutorial!!! I love how the make up brush roll up turned out! Here is a picture of mine : http://i252.photobucket.com/albums/hh8/sophiesmommy818/jan12004.jpg
ReplyDelete[IMG]http://i252.photobucket.com/albums/hh8/sophiesmommy818/jan12002.jpg[/IMG]
I love these fabrics.. Great Job!
DeleteI just made this and I love it. The only thing I wish I changed was the shape of the flap. I would have liked the flap to curve inward at both sides so when I roll it the edges dont stick out.
ReplyDeleteI have been wanting to make my granddaughter a roll up for her cosmetoligist tools but wasn't quite sure where to begin. This is great. Thank you.
ReplyDeleteI just made a make up roll for my friend (and I gave the flap a curved shape as Glory advised). It looks fantastic - many thanks for the tutorial.
ReplyDeleteThis comment has been removed by the author.
ReplyDeleteGreat tutorial! I linked it in my blog with the roll that I made here at BugsNPeanuts.
ReplyDeletehttp://bugsnpeanuts.blogspot.com/2013/04/a-thing-of-beauty.html
Thanks for this tutorial, i cant wait to try ypur tips to make this beautiful makeup brush roll.. Great idea and thanks for sharing!
ReplyDeleteIf you have time, you can also visit this website: http://blushies.com/